

Configuring KASM for SSO with Microsoft
Level up your KASM instance by doubling down on Least Privilege, RBAC, and MFA


In the previous three KASM articles, we talked about setting up KASM on-prem and in the cloud. We also mentioned using CloudFlare for reverse proxy and being able to require MFA for signin. To kill two birds with one stone, this article will look at changing MFA to Microsoft and then allowing Microsoft to also handle user provisioning based on Entra ID groups.
So what?
The desired state at the end of this tutorial is to be able to take your existing KASM instance and allow users in your organization to sign in and be assigned specific Workspaces based on Entra ID group memberships. If your Microsoft accounts require MFA (WHICH THEY SHOULD), you’ll pick up that added bonus. If you haven’t set up your KASM instance yet, checkout the previous articles in this series here: part 1, part 2, and part 3.
Below, we’ll go through the process of setting up an App Registration in Azure, we’ll configure SSO in KASM to use Microsoft for authentication, and we’ll delegate access to KASM workspaces based on Entra security group membership.
Getting Started:
Creating an App Registration in Azure
Go to portal.azure.com and search for App Registrations. On the App Registrations page, click + New Registration.
On the New Registration page, there are 4 things that need to be completed:
Name your application
Select Accounts in this organizational directory only (otherwise anyone with an MS account can sign in)
For redirect URI, select Web
Enter your OIDC callback address. For KASM, this will be your KASM’s domain name followed by /api/oidc_callback. In my case, https://kasm.lomlabs.work/api/oidc_callback

Next, click Register at the bottom of the screen.
After registering, you’ll be back at the new App’s Overview page. Copy the Application (client) ID (1 below) and save it for later. Then click on Client Credentials: Add a certificate or secret (2).

Under Client Secrets, click + New client secret

Give it a name, and pick an expiration date:

IMPORTANT: On the next screen, copy the Client Secret Value (not the Secret ID). The Secret Value can only be seen immediately after creation. If you forget to copy it, you’ll need to delete the secret and make a new one.

Next, from the Overview page again, click Endpoints near the top of the page.

It will open up a blade on the side of the page with a lot of website addresses. You need to copy the ones for OAuth 2.0 authorization endpoint (v2) and OAuth 2.0 token endpoint (v2). NOTE: Be sure to pick v2 instead of v1.
Next, click on the Token Configuration link under the Manage menu on the left-hand navigation menu, then +Add Group Claim. Check the box for Security Groups, and then click Add.

Configuring KASM
Once you have those details gathered, log in to your KASM instance and go to the Admin tab, then go to Access Management —> Authentication —> OpenID and then click on + Add Config.
In the Display Name field, enter the text you want to show up next to the Login with Microsoft button on the KASM login page. I’m going to use Microsoft Login.
For logo URL, you can use https://www.microsoft.com/favicon.ico
Toggle on the Enabled switch
Toggle on the Default switch
If you toggle on the Auto Login switch, then when you visit your KASM page it will automatically kickoff the Microsoft sign in process.

In the Client ID field, enter the Application (Client) ID from Azure.
In the Client Secret field, enter the secret value from Azure.
For Authorization URL, use the web address you copied for the OAuth 2.0 authorization endpoint (v2) value
For the Token URL, use the web address you copied for the OAuth 2.0 token endpoint (v2) value
The User Info URL will be https://graph.microsoft.com/oidc/userinfo

Under Scope, enter openid, email, and profile, each on a separate line.
For username attribute, enter email, and for Groups Attribute put groups.
In the Redirect URL, put the same value you entered for URL Redirect in the Azure application (i.e., domain name followed by /api/oidc_callback), and click Save.

Testing It Out
At this point, your KASM login page should now have a Microsoft Login button.

The first time you login to this application, you’ll need to Consent to the use of the application for your organization (if you’re an M365 admin). If you aren’t an admin, you’ll have to submit a request for approval.

Granular Group Access
Now that the connection between Microsoft and KASM is complete, we can work on providing tailored KASM access based on Microsoft Security Group roles in Entra ID.
In KASM as an Administrator, go to Access Management —> Groups —> + Add Group.
We’re going to create an Admin group that’s tied to my IT-Admin Group in Azure. Enter the group name, Priority (lower numbers are higher priority… There is a default system Administrator group with priority 1, so we’re using 2), then click Save.

Now that the group is created, click on the group and select the edit icon so we can configure it. Once in edit mode, select SSO Group Mappings from the top tabs and then click on + Add SSO Mapping and a dialog box will open. In the SSO Provider drop down, pick the display name of the OpenID connection we set up earlier. Then, leave this dialog box open and head to a new tab.
Now, take a short detour to Azure and search for the Security Group you want to map to this KASM group. Copy the Azure Object ID for the group like below:

Now, enter this Object ID in the Group Attributes box in the Add SSO Group Mapping Dialog box that’s open in KASM and click Submit.

Now that the groups are mapped, go back to the Access Management —> Groups tab in KASM admin, click the Edit icon next to your new group, go to the Permissions tab at the top of the page, and then click + Add Permissions. For an administrator group, select Global Administrator from the drop-down menu and then click Submit.

To maintain the principle of least privilege, assign Global Admin sparingly. Instead, KASM supports granularly adding only the specific permissions you may need. So, instead of assigning all of the rights, start with none and build up from there. A list of all permissions can be found here. By default, unless a user is added to a group with elevated permissions, they will be automatically assigned to the “All Users” group that is provided with only user-level Workspace access.
Custom Workspace Groups
To further configure KASM for different groups, you can additionally create custom workspaces that only feature specific containers. For example, if you have an IT Admins group, it may have tools available like Nessus, Kali, or Maltego that you may not want every user to have access to. To tailor available apps in a group, simply go to Access Management → Groups → Select the Group → Click on the Workspaces tab, and click +Add Workspaces. Note that it will only allow you to choose from Workspaces that have already been installed from the registry.
Generally, I don’t provide any tools in the default All Users group. Instead, to help make sure role-based assignments are maintained, apps are only assigned to groups that are validated against Entra groups.
For Example…
In case the previous sections got a little muddy, let’s walk through setting up a Kasm group. The Entra security group I want to use is called “Lombardo Test User Group” and has a group Object ID that is like a9088……….35902. It has the members in it that I want to deploy Kali Linux to.
Step 1: Copy the Object ID from the security group in Azure

Step 2: In KASM, go to Access Management → Groups → Add Group. On the Create Group page, name the group, and give it a priority that’s less than the priority of your All Users group (1000 by default). The logic here is Match First not Match All… so if a user belongs to multiple groups, they will be assigned to the group that has the lowest priority number. Click Save.

Step 3: In the new group, click on the SSO Group Mappings tab and click +Add SSO Mapping

Step 4: Select the OID SSO Provider we previously set up, and paste the Group’s Object ID number from Entra in the Group Attributes box. Click Submit.

Step 5: Back on the Groups page, click the Edit icon:

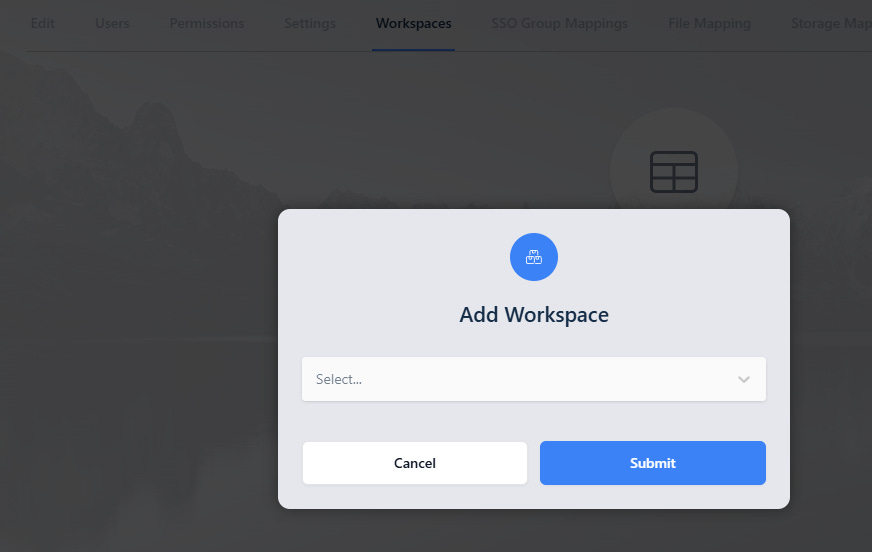
Step 6: Click on Workspace → +Add Workspaces → Select the Kali workspace and click submit.

Voila! Now anyone assigned to the Lombardo Test Group in Entra will have access to the Kali container in KASM. If the user is already signed in to a session, they will need to log out and back in.

In contrast, if someone logs in who is a member of the IT Admin group, they’ll have the option to choose between Admin panel and Workspaces, and they will have access to both assigned workspaces, Kali and Edge:
