


Docker is a platform used to run applications in lightweight, portable environments called containers, and it’s the starting point for a tons of tech projects. To help speed up the process of getting Docker in place, below is a quick installation guide that assumes you have an Ubuntu machine primed and ready to go.
Docker Install
From the command line of Ubuntu server, we’re going to install Docker.
First, go to the Docker Install page for Ubuntu found here and copy the code to set up Docker’s apt repository (or just grab it from here 😉) :
# Add Docker's official GPG key:
sudo apt-get update
sudo apt-get install ca-certificates curl
sudo install -m 0755 -d /etc/apt/keyrings
sudo curl -fsSL https://download.docker.com/linux/ubuntu/gpg -o /etc/apt/keyrings/docker.asc
sudo chmod a+r /etc/apt/keyrings/docker.asc

# Add the repository to Apt sources:
echo \
  "deb [arch=$(dpkg --print-architecture) signed-by=/etc/apt/keyrings/docker.asc] https://download.docker.com/linux/ubuntu \
  $(. /etc/os-release && echo "${UBUNTU_CODENAME:-$VERSION_CODENAME}") stable" | \
  sudo tee /etc/apt/sources.list.d/docker.list > /dev/null
sudo apt-get update
Paste that block into your server’s terminal and hit enter, and it will do its thing:
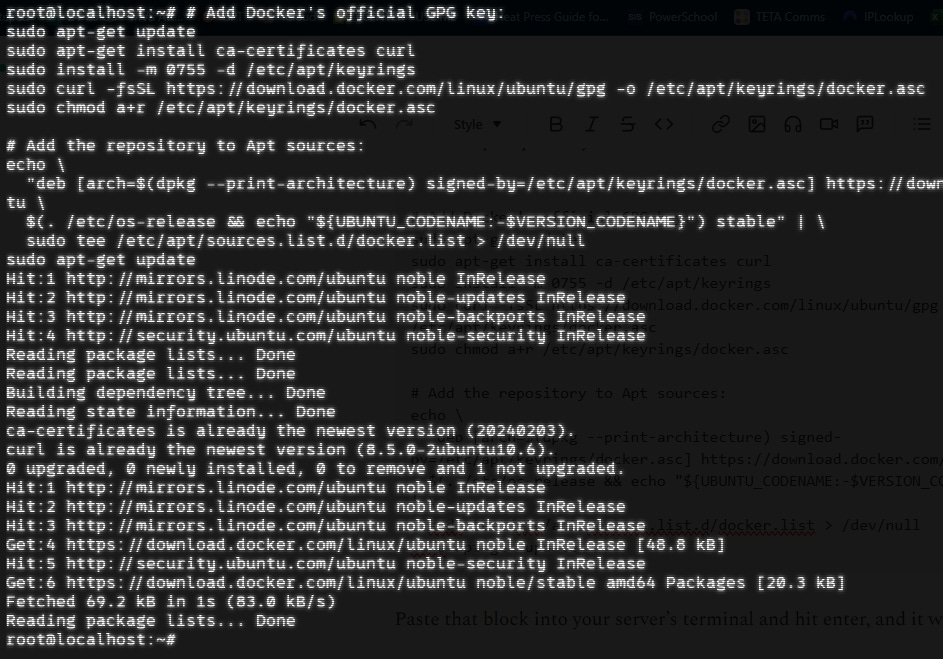
Next, you’ll copy and paste this command (also from the Docker Ubuntu install page linked above):
sudo apt-get install docker-ce docker-ce-cli containerd.io docker-buildx-plugin docker-compose-pluginAfter that runs, you can test to make sure Docker is running with this command:
sudo docker run hello-worldIf successful, you should see:
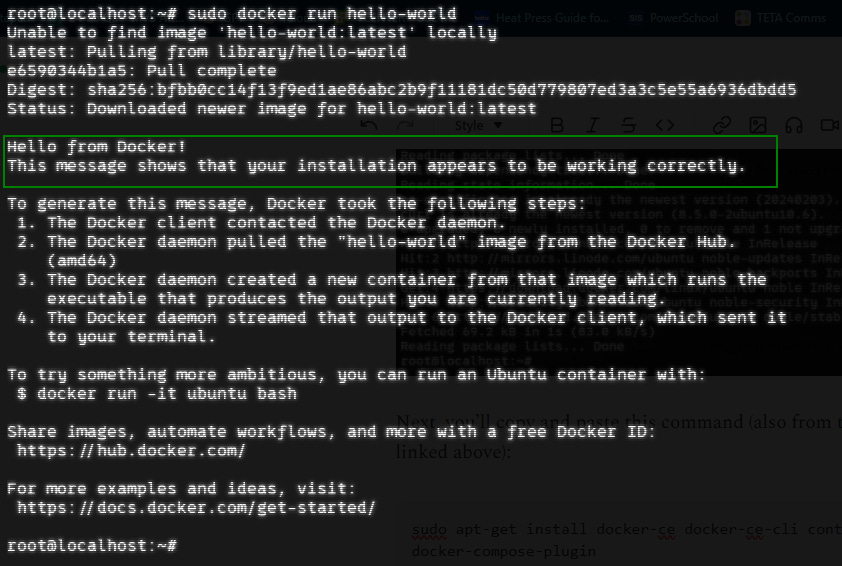
And that’s it—Docker is up and running!